In this article, We are going to perform How to Attach IAM Role to EC2 Instance using CLI. Replace and Modify IAM Roles with EC2 using CLI
How to Attach IAM Role to EC2 Instance
Step #1: Create two IAM roles “myiams3role1” & “myiams3role2” assign s3fullaccess to them.
Step #2: Create EC2 Instance
Step #3: Login to EC2 using CLI.
Step #4: Assign role “myiams3role1” to EC2 instance using CLI
aws ec2 associate-iam-instance-profile --instance-id i-06630666d37381864 --iam-instance-profile Name=myiams3role1

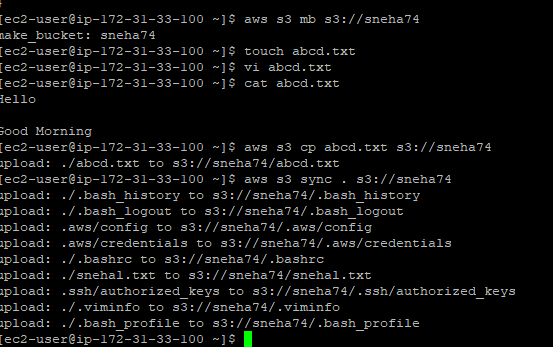
Step #5: Create S3 Bucket “sneha74” and object “abcd.txt” and upload object into bucket then use sync command to copy all local files into bucket using IAM role “myiams3role1”
Step #6: Run the command to get the E2 configuration,(Ex: Instance Id, Association Id, Running Role)
aws ec2 describe-iam-instance-profile-associations
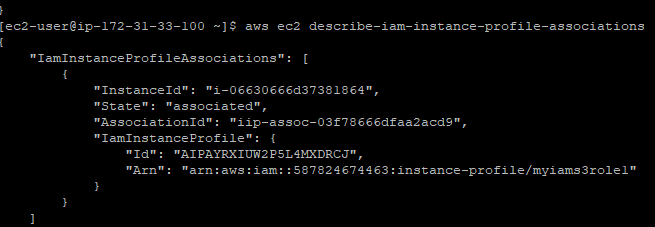
Note: Please take association id for the role, which is assign to EC2, Also you can refer the step 4 to get association Id where we have assigned the role.
Step #7: Replace EC2 IAM role on running EC2 instance.
aws ec2 replace-iam-instance-profile-association --association-id ip-assoc-03f78666dfaa2acd9 --iam-instance-profile Name=myiams3role2

Successfully IAM role “myiams3role2” assigned on running EC2 instance
Step #8: Now create new object “pqrs.txt” and upload in bucket “sneha74” using different role i.e “myiams3role2”
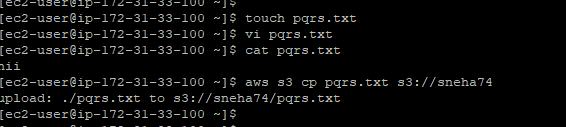
Successfully uploaded object in bucket using different IAM role.
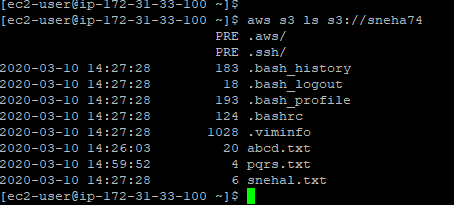
Step #9: List of all objects in S3:
Conclusion:
We have covered How to Attach IAM Role to EC2 Instance using CLI. Replace and Modify IAM Roles with EC2 using CLI.
Related Articles:
How to Create Ubuntu Instance in AWS [7 Steps]
How to Create S3 Bucket in AWS [ 2 Steps]
How to connect to AWS EC2 Instance using MobaXTerm
How to Enable Password Authentication for AWS EC2
How to Connect EC2 Instance using Putty
How to Transfer files to AWS Instance using WinSCP [2 Steps]
How to Create AWS DocumentDB and Connect [3 steps]
How to Install MySQL 5.7 on Amazon Linux 2
AWS Create Instance from snapshot
AWS Create EC2 Instance from Snapshot
How to Create Postgres RDS in AWS and connect
Reference: